

Learning Builder.io from a Developers Perspective

I sat down with Tim Benniks, who is a professional developer advocate, to introduce him to Builder.io. It was great to hear what questions a developer might have when being first introduced to the tool. I know Tim is well versed in all things Jamstack, so he wasn't coming into the conversation completely blind.
Key Takeaways
It was a huge help to talk with Tim about a product that I am supporting and building awareness about.
What Developers need to know
- Developers want to see code
- Understanding of what data is required to build out the pages, user interface, and state management
- How custom components can be used
What I learned
Because I have been learning the product over several months now there were many areas that I take for granted. When I show people the product it is going to be important to mention very key items that both developers and content creators will find useful. For instance, when I was entering one of the data bindings for state Tim was surprised by the editor.
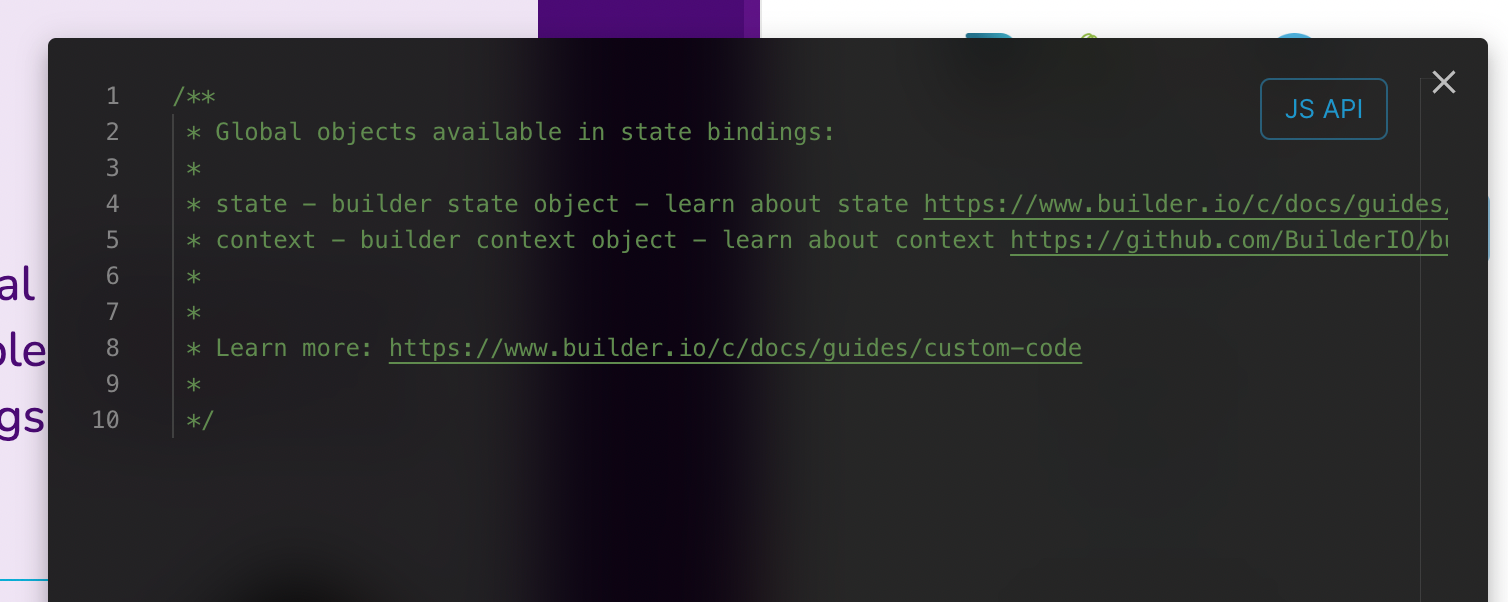
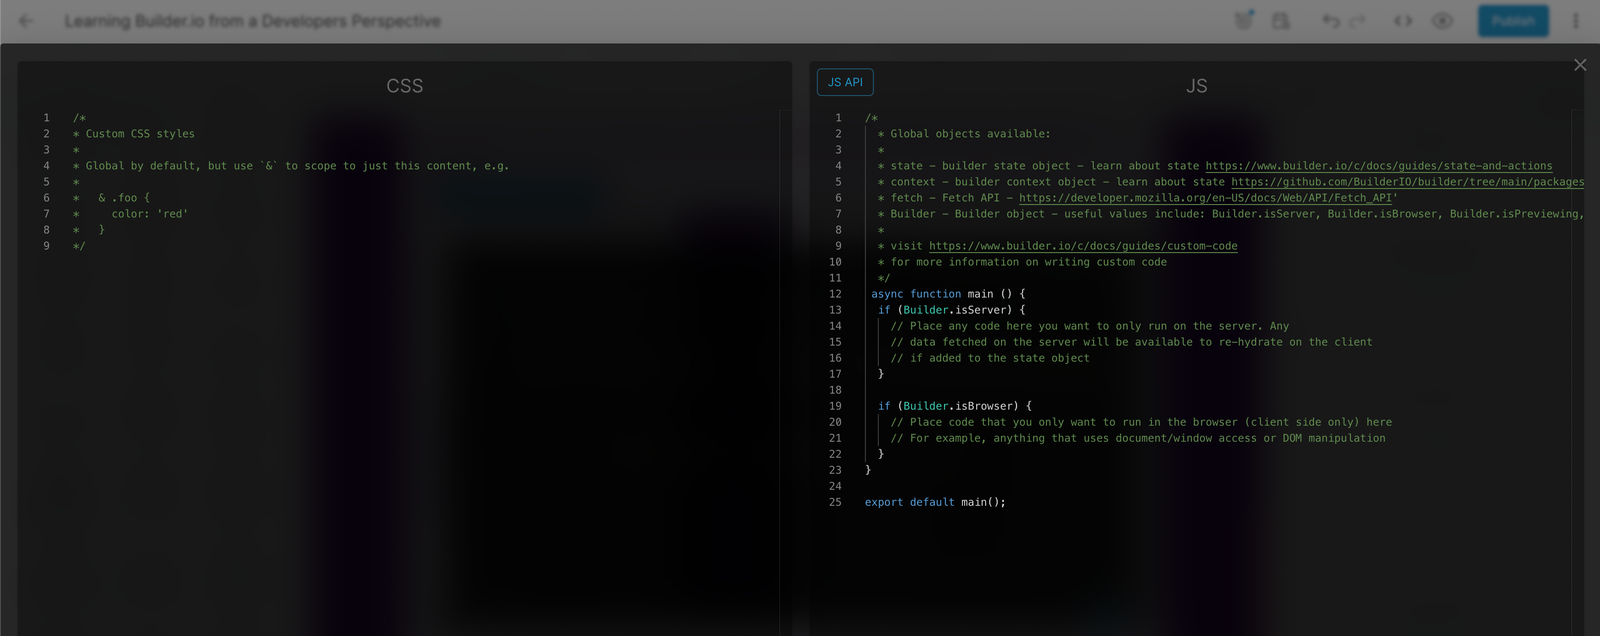
Something I forgot to mention was the fact this is not the only editor. Not only can you use components and bind dynamic data, there is also the capability to access global styling and JavaScript with a built in editor as well. In the image below you can see that you are also able to run JavaScript on the server via Builder.isServer as well as only on the client via Builder.isBrowser.
More Details
Below are some more details that may have been missed in the video. I am sure as I learn more I will release some more videos, both on CodingCat.dev and Builder.io.
This is probably one of the biggest areas to understand in builder. In most of the common frameworks that we use today they have very specific and well defined methods of calling APIs. Explaining that the framework is best suited to do this in must cases for creating pages and structure to your site. For instance when we were walking through how to create pages in Next.js, it is key to call your CMS (no matter if this is builder or something else) to build out post pages.
Below is how CodingCat.dev creates pages in Next.js. This will be the same in Nuxt, SvelteKit, Gatsby or anything that creates SSG pages.
export async function getStaticPaths() {
  const paths: string[] = [];
  for (const postType of [
    ModelType.page,
    ModelType.post,
    ModelType.tutorial,
    ModelType.podcast,
    ModelType.course,
    ModelType.authors,
  ]) {
    const pages = (await getAllBuilder({
      model: postType,
      fields: `data.url`,
      startEnd: true,
    })) as CodingCatBuilderContent[];
    pages
      .filter(
        (page) =>          !['/blog', '/courses', '/podcasts', '/tutorials'].includes(
            `${page?.data?.url}`          )
      )
      .map((page) => paths.push(`${page?.data?.url}`));
  }
  return {
    paths,
    fallback: true,
  };
}
When the page is then generated you must call your CMS for that specific page and pass the data that is required to generate the visual page.
getAllBuilder({
          preview,
          model: slug ? type : 'page',
          limit: 1,
          userAttributes: {
            urlPath: '/' + (params?.page?.join('/') || ''),
          },
          startEnd: true,
        }),
Then when this data passes into the system it is in two different areas of BuilderComponent, content and data.
<BuilderComponent
	options={{ includeRefs: true }}
	model={model}
	content={modelData}
	data={{
		recentPosts,
		modelData,
		courseData
	}}
/>
Below is a breakdown that I made so that you can understand what all the props for the BuilderComponent actually do. As you can see data is meant to include dynamically changing state data, and content will be your pages data as Described by the Builder.io JSON.
https://cdn.sanity.io/files/hfh83o0w/dev/1b236cbae3dc5c84d31a1542a65f6fbf41379947.png
Builder JSON
As you are using the visual editor, ever developer knows that all of this has to end up as HTML and CSS in the end. Because Builder.io creates a special serialized JSON this is what allows it to be translated into any framework using Builder.io's open source project Mitosis.
Below is an example of what that JSON looks like (again available directly within the visual editor data section.
{
	"ownerId": "303fa35cceca49e6ab548071602c8ebd",
	"lastUpdateBy": null,
	"createdDate": 1649885165355,
	"id": "df677f1d384f4c708cf2e64d41038d33",
	"@version": 3,
	"name": "Learning Builder.io from a Developers Perspective",
	"modelId": "3346f48bd7cf4337aa99627827b24b4a",
	"published": "draft",
	"meta": {
		"kind": "page",
		"hasLinks": false
	},
	"priority": -1853.5,
	"query": [
		{
			"@type": "@builder.io/core:Query",
			"property": "urlPath",
			"operator": "is",
			"value": "/post/learning-builder-io-from-a-developers-perspective"
		}
	],
	"data": {
		"page": {
			"title": "Learning Builder.io from a Developers Perspective",
			"authors": [
				{
					"author": {
						"@type": "@builder.io/core:Reference",
						"id": "d4652e9fa73543dc8a422e20608fc7d2",
						"model": "author"
					}
				}
			],
			"frameworks": [],
			"excerpt": "I sat down with Tim Benniks who is a developer advocate, for his first time ever checking out Builder.io. It was great to hear what questions a developer might have about creating pages with a Visual Editor.",
			"coverPhoto": {
				"created_by": {
					"id": "dbfd615dfc7e1b5d5a6d1427802862",
					"type": "user"
				},
				"url": "https://cdn.sanity.io/images/hfh83o0w/dev/a7b78d1d7cc92b18602ac3107130fa1ebcef1b38-1920x1080.jpg",
				"uploaded_by": {
					"id": "dbfd615dfc7e1b5d5a6d1427802862",
					"type": "user"
				},
				"resource_type": "image",
				"access_mode": "public",
				"bytes": 699229,
				"format": "jpg",
				"metadata": {},
				"type": "upload",
				"version": 1649885350,
				"height": 1080,
				"tags": [],
				"width": 1920,
				"duration": null,
				"secure_url": "https://cdn.sanity.io/images/hfh83o0w/dev/a7b78d1d7cc92b18602ac3107130fa1ebcef1b38-1920x1080.jpg",
				"created_at": "2022-04-13T21:29:10Z",
				"public_id": "main-codingcatdev-photo/Learning_Builder.io_from_a_Developers_Perspective"
			}
		},
		"title": "Learning Builder.io from a Developers Perspective",
		"inputs": [],
		"blocks": ["/* @ref:block:builder-ad4ccd18b8fb48869d2af8910c217787 */"]
	},
	"metrics": {
		"clicks": 0,
		"impressions": 0
	},
	"variations": {},
	"lastUpdated": 1649897478865,
	"testRatio": 1,
	"screenshot": "https://cdn.builder.io/api/v1/image/assets%2F303fa35cceca49e6ab548071602c8ebd%2F78aab7136e5d44ba878113dc279fa6a5",
	"createdBy": "HYxMkZFRmMTuS5LD6DoM9GlsuXV2",
	"lastUpdatedBy": "HYxMkZFRmMTuS5LD6DoM9GlsuXV2"
}
The "blocks" item is where ever single item that is in our layers panel will be described as a unique block component. It is far too large to show everything. Below is an example of one of those blocks. In this case it is our custom Next.js component called NextImage.
{
	"@type": "@builder.io/sdk:Element",
	"@version": 2,
	"id": "builder-a882c6d717364475be6dc0cef0f178a0",
	"component": {
		"name": "NextImage",
		"options": {
			"layout": "responsive",
			"width": 1920,
			"height": 1080,
			"alt": "An image description",
			"className": "rounded-xl",
			"cloudinaryImage": {
				"public_id": "main-codingcatdev-photo/BuilderComponent",
				"resource_type": "image",
				"type": "upload",
				"format": "png",
				"version": 1649896683,
				"url": "https://cdn.sanity.io/images/hfh83o0w/dev/514917596087084d629168964d3f8e6aecec314e-1920x1080.png",
				"secure_url": "https://cdn.sanity.io/images/hfh83o0w/dev/514917596087084d629168964d3f8e6aecec314e-1920x1080.png",
				"width": 1920,
				"height": 1080,
				"bytes": 317529,
				"duration": null,
				"tags": [],
				"metadata": {},
				"created_at": "2022-04-14T00:38:03Z",
				"access_mode": "public",
				"created_by": {
					"type": "user",
					"id": "dbfd615dfc7e1b5d5a6d1427802862"
				},
				"uploaded_by": {
					"type": "user",
					"id": "dbfd615dfc7e1b5d5a6d1427802862"
				}
			}
		}
	},
	"responsiveStyles": {
		"large": {
			"borderRadius": "20px",
			"boxShadow": "-webkit-box-shadow: 5px 5px 15px 5px #000000;  box-shadow: 5px 5px 15px 5px #000000;"
		}
	}
}
I can't come close to teaching you everything about Builder.io in a single post, but my team is building out documentation, courses, and videos to help developers be successful!
Resources, Links & Official Documentation
- Builder.io Developer Documentation: Visual headless CMS, SDKs, and design-to-code workflows
- Next.js Official Documentation: App Router, Server Actions, and rendering architecture guides
Related CodingCat.dev Tutorials & Podcast Episodes
- Supabase, Next.js and Builder.io: We will walk through how to get up and running on Next.js with Supabase. Then we will build UI using http://builder.io/.
- Supabase, Next.js and Builder.io: Jon Meyers sits down with Alex to talk about Supabase, Next.js and Builder.io.
- Using No-Code with Builder - Part 1: In this first part Alex sits down with Steve Sewell to understand how http://builder.io/ is different from other no-code solutions.
Frequently Asked Questions (FAQ)
What are the main takeaways from Learning Builder.io from a Developers Perspective?
I sat down with Tim Benniks who is a developer advocate, for his first time ever checking out Builder.io. Learning Builder.io from a Developers Perspective explores practical patterns for Builder.io, Next.js in modern software engineering. Throughout this post, Alex Patterson breaks down real-world implementation details for Builder.io, Next.js so developers can apply these patterns directly in production.
How do you implement Builder.io best practices in production?
When adopting Builder.io and Next.js in a production stack, start by validating your configuration against the Builder.io Developer Documentation (Visual headless CMS, SDKs, and design-to-code workflows). Focus on incremental adoption, automated testing, and observability so your team can measure performance and developer velocity improvements at each stage.
Where can I watch the full Learning Builder.io from a Developers Perspective walkthrough and find related code resources?
You can explore the complete write-up and code examples right here on CodingCat.dev, and subscribe to the CodingCat.dev YouTube channel for weekly video tutorials. For a deeper dive into Builder.io, check out our related guide: Supabase, Next.js and Builder.io.
how this post connects together.
Follow AJ from first principles to production-ready architecture.
Watch the Related Video Deep Dive: Sanity Content Operating System: Live Content API, Media Library & Functions
Master the 2026 Sanity Content Operating System: structured schemas, TypeGen + stegaClean visual editing, Organization Media Library, Sanity App SDK, and event-driven Sanity Functions with Blueprints.